I will improve this blog as time permits.
Bob Zook Designs
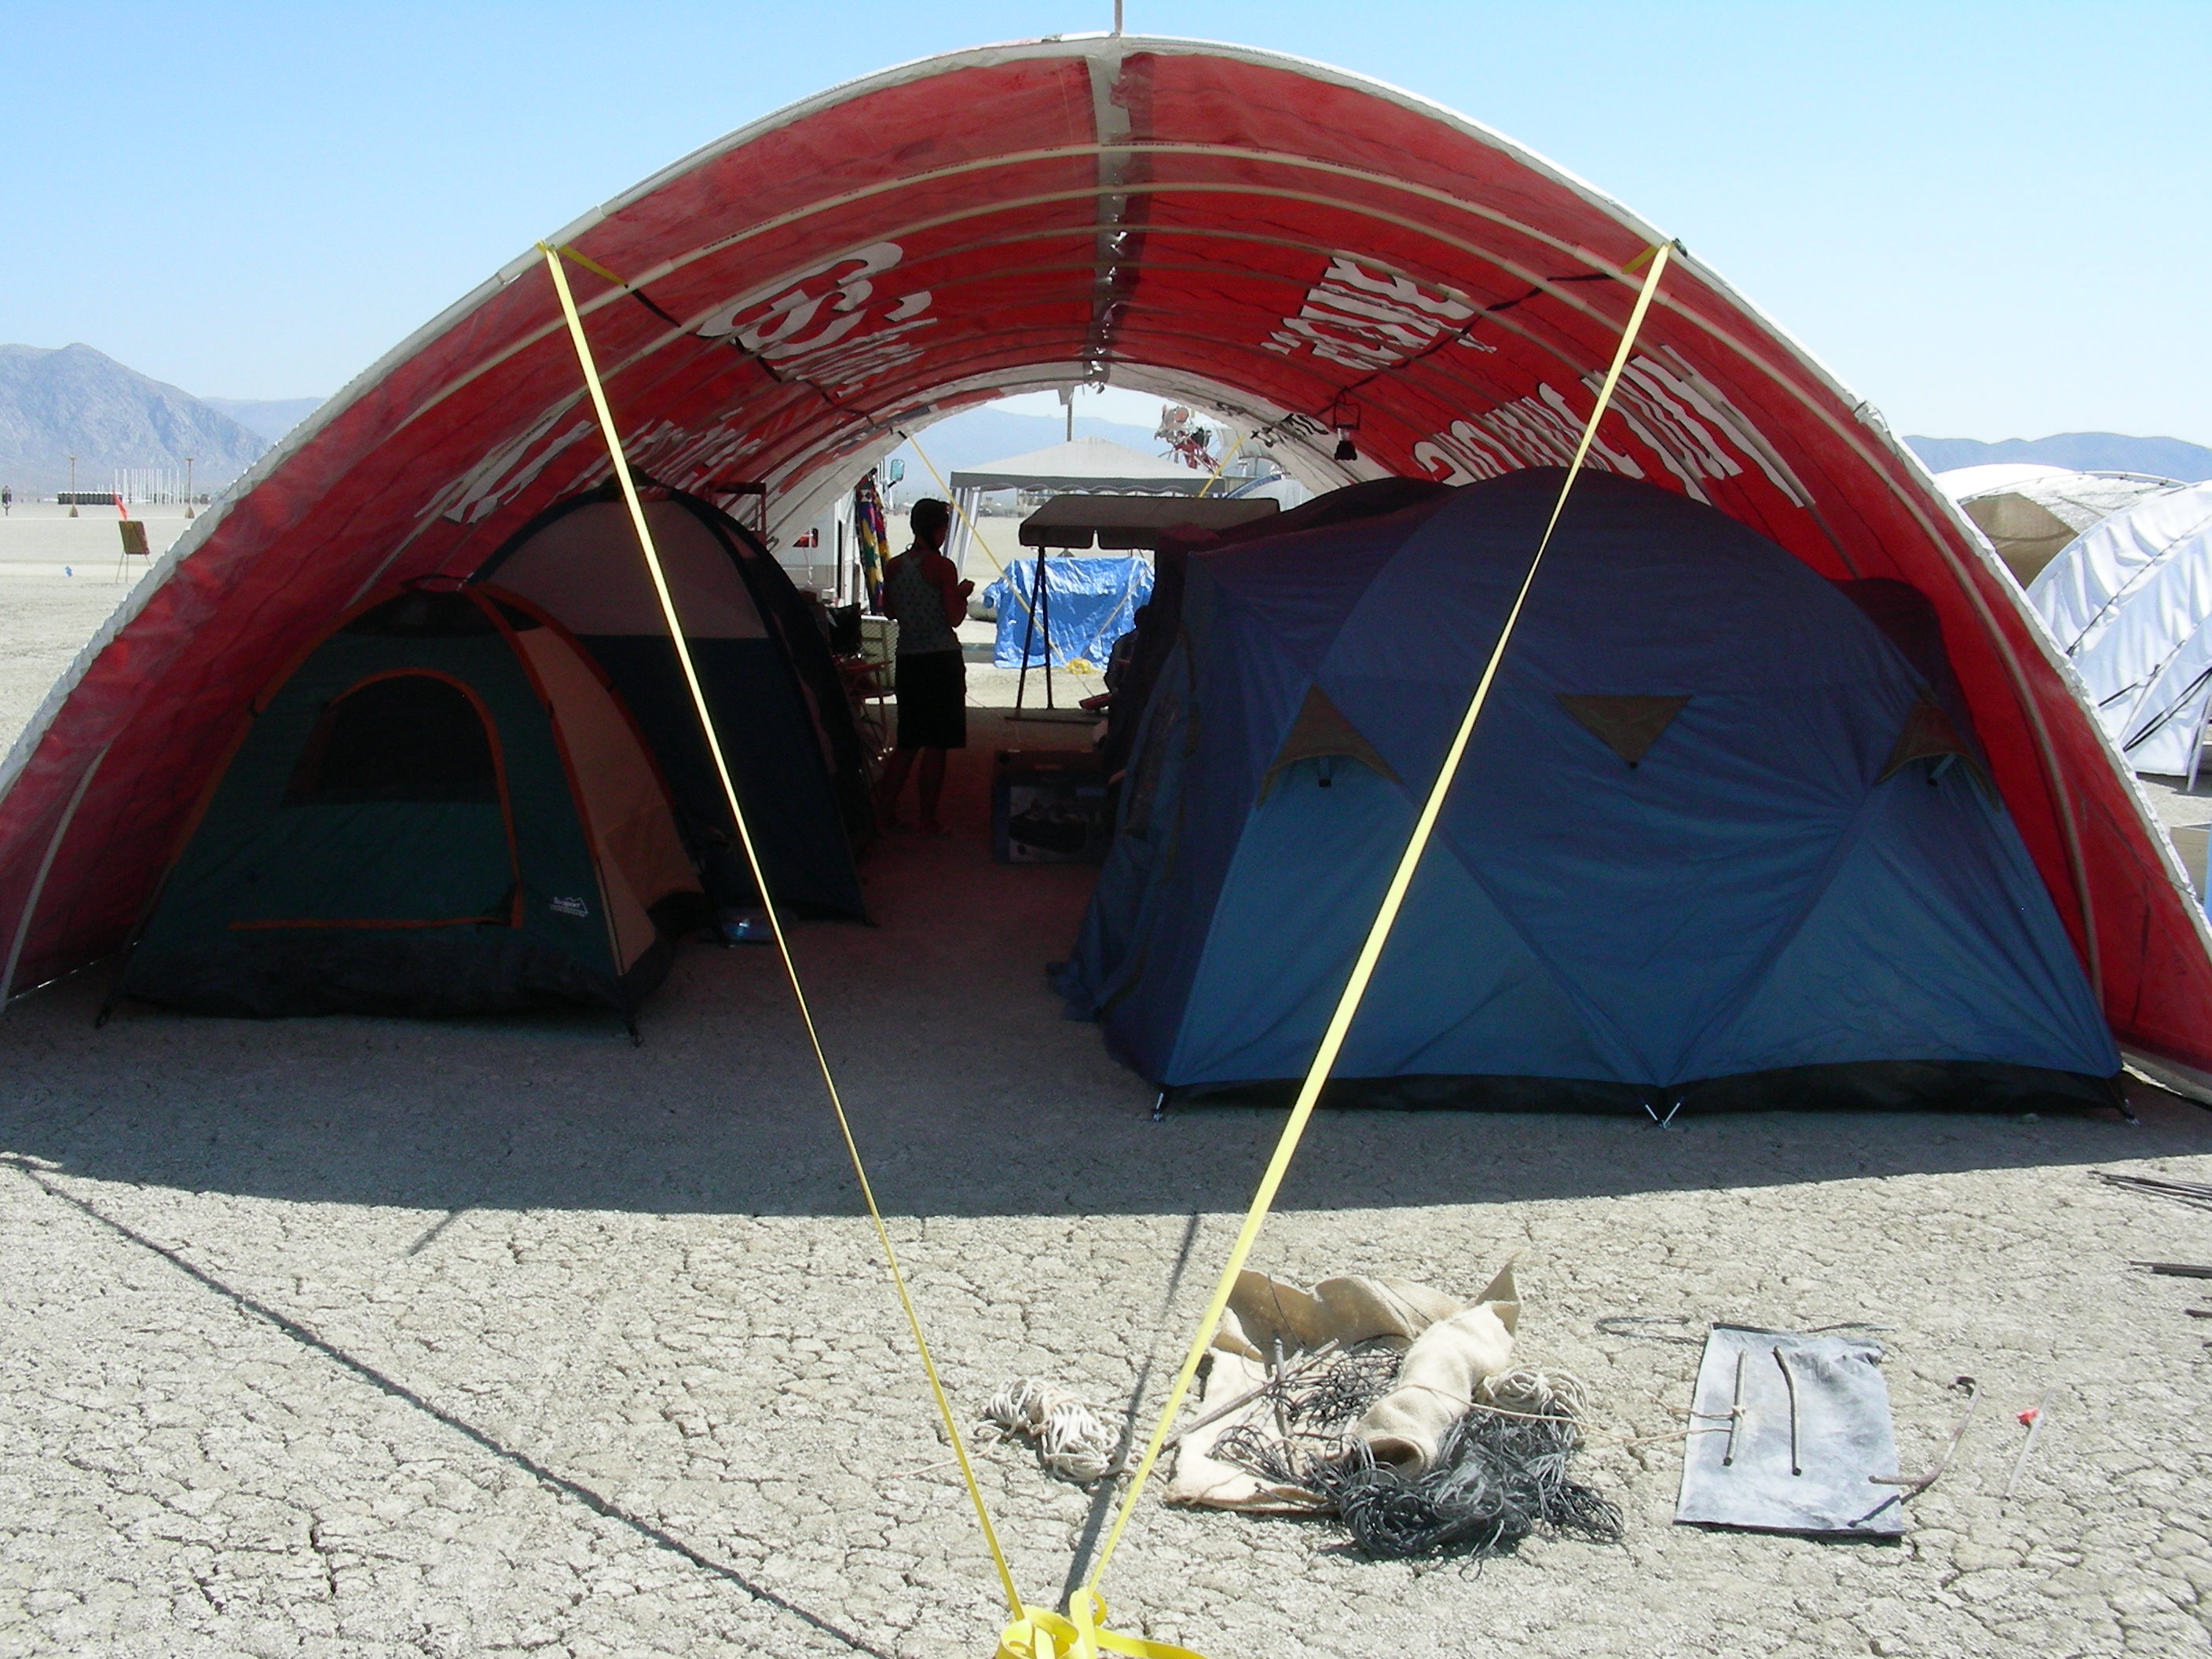
This information is some rambling instructions on how to build a shade arch for Burninng Man.
the arch holds 10 to 12 large tents and will fold in but survive some pretty high winds.
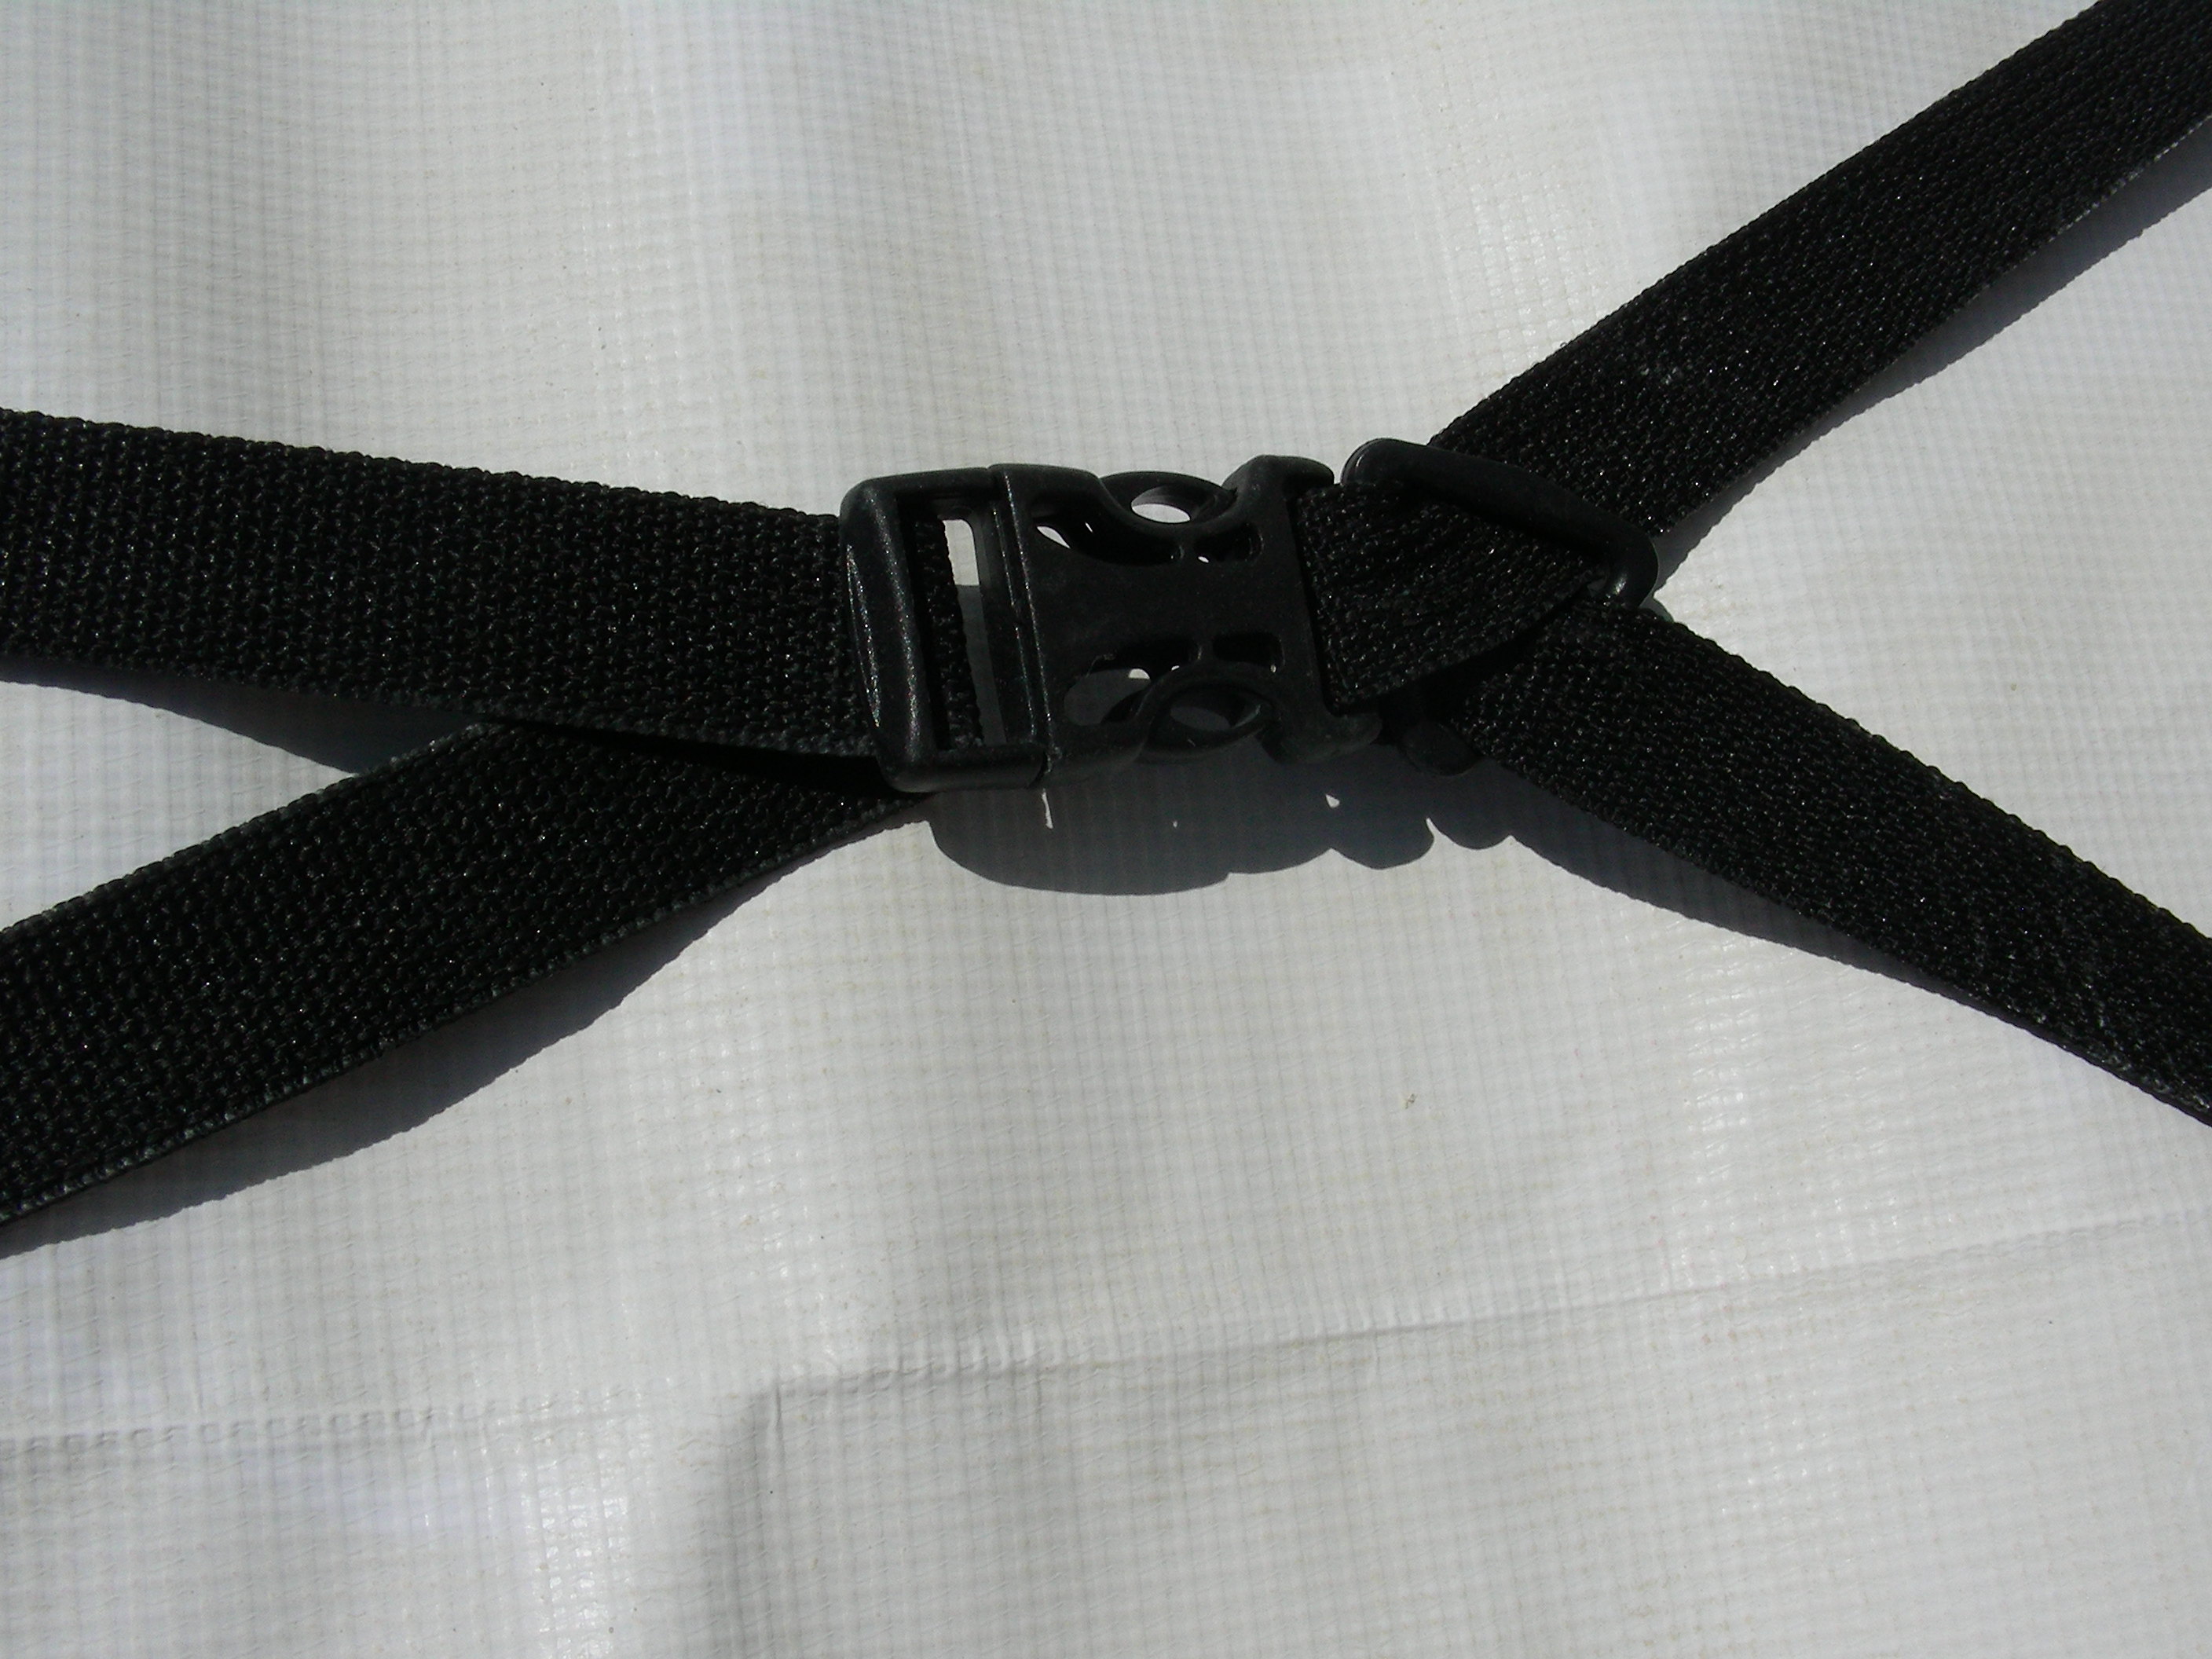
It uses 1" flat nylon webbing and plastic "fastex" style connectors. Hitex http://www.hitexcorp.com/5.html, +1 800 286 0659). Cheep 300ft for under $10
Also of great value are 2X 15x50' vinyl billboard tarps. they block IR so much better then anything else i have ever used.
 Click on the drawing for some detail of the arch construction.
_____________________________________________________________

Some comments from
John Gilmore's home page
While at Burning Man in 2007, we saw similar structures in Camp I Am, whose ropes were greatly simplified by instead using nylon webbing straps and a few cheap plastic connectors. Bob Zook showed us his design, and gave us a supply of the right connectors. We'll find the webbing somewhere online for 2008. One suggested place is Hitex (http://www.hitexcorp.com/5.html, +1 800 286 0659). Bob says: "You can go to their web site but there's no information there to speak of. Calling them is the best way to get info. The bad news is the price of light weight 1" black poly flat webbing went up from $7.20 per 100yd to 8.40."More from Bob:
I really need to blog the arch design. 3 years now and we haven't been able to improve it. it might be close to optimized. Last year one of the arches got a weird torsion flex in it and it was hard to figure out what was going on. I suspect it was shoddy layout of the rebar. The rebar has to be symmetrical or you transfer loads to places they shouldn't be.I found a few pictures that might help as well. But the gem of the design is a simple friction knot i use at the webbing rebar interface under the PVC pipes. I don't have a picture or drawing to describe it. (picture now added below)
This will mean we use a lot less rope and have a much easier time adjusting the tension in the structure (just unsnapping a buckle, sliding it along the webbing, and resnapping it). It also requires half as many rebar stakes, because the webbing attaches to the same stakes as the PVC pipes; and it simplifies measuring on the ground, because the premade coupler lines can be used to measure where to pound in the rebar.
Here are some photos of that structure. Click on most of them to see or download a full-sized version.
This is looking at the sawline and the trough lines girth hitched to it. The loops at the bottom of the saw lines go around the rebar twice
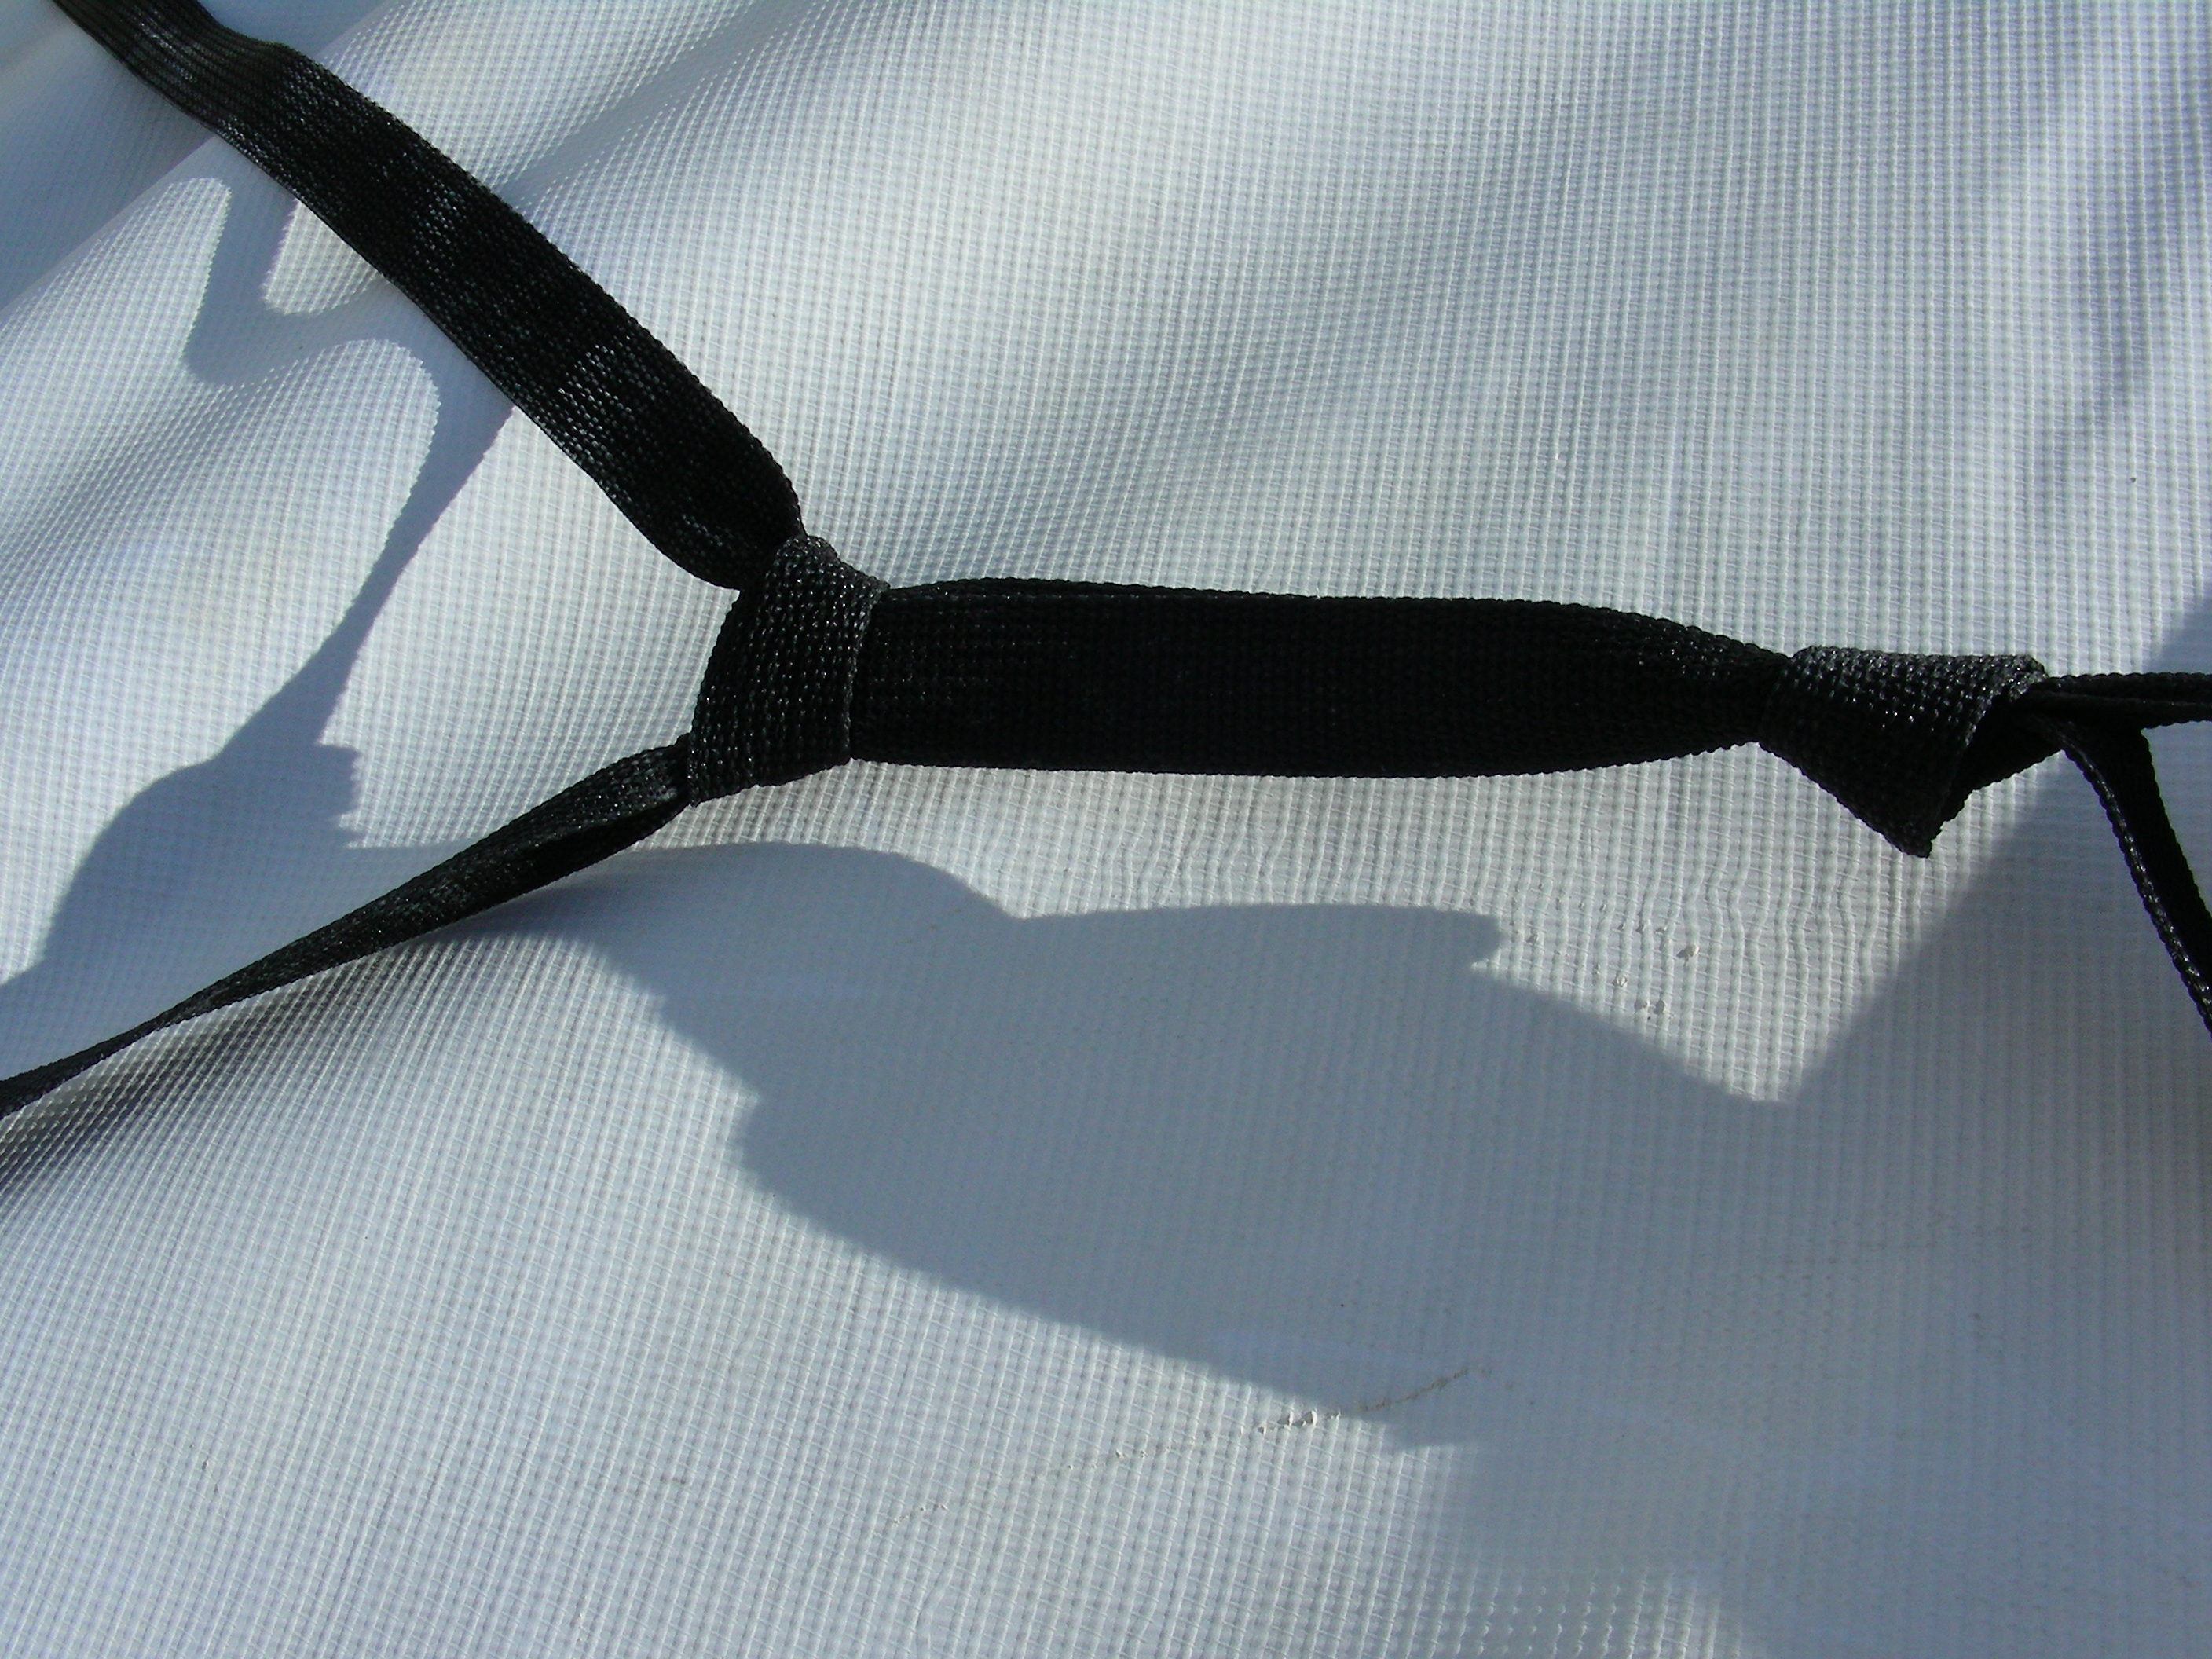
This is the girth hitch that connects the saw line on the left to the trough line on the right.
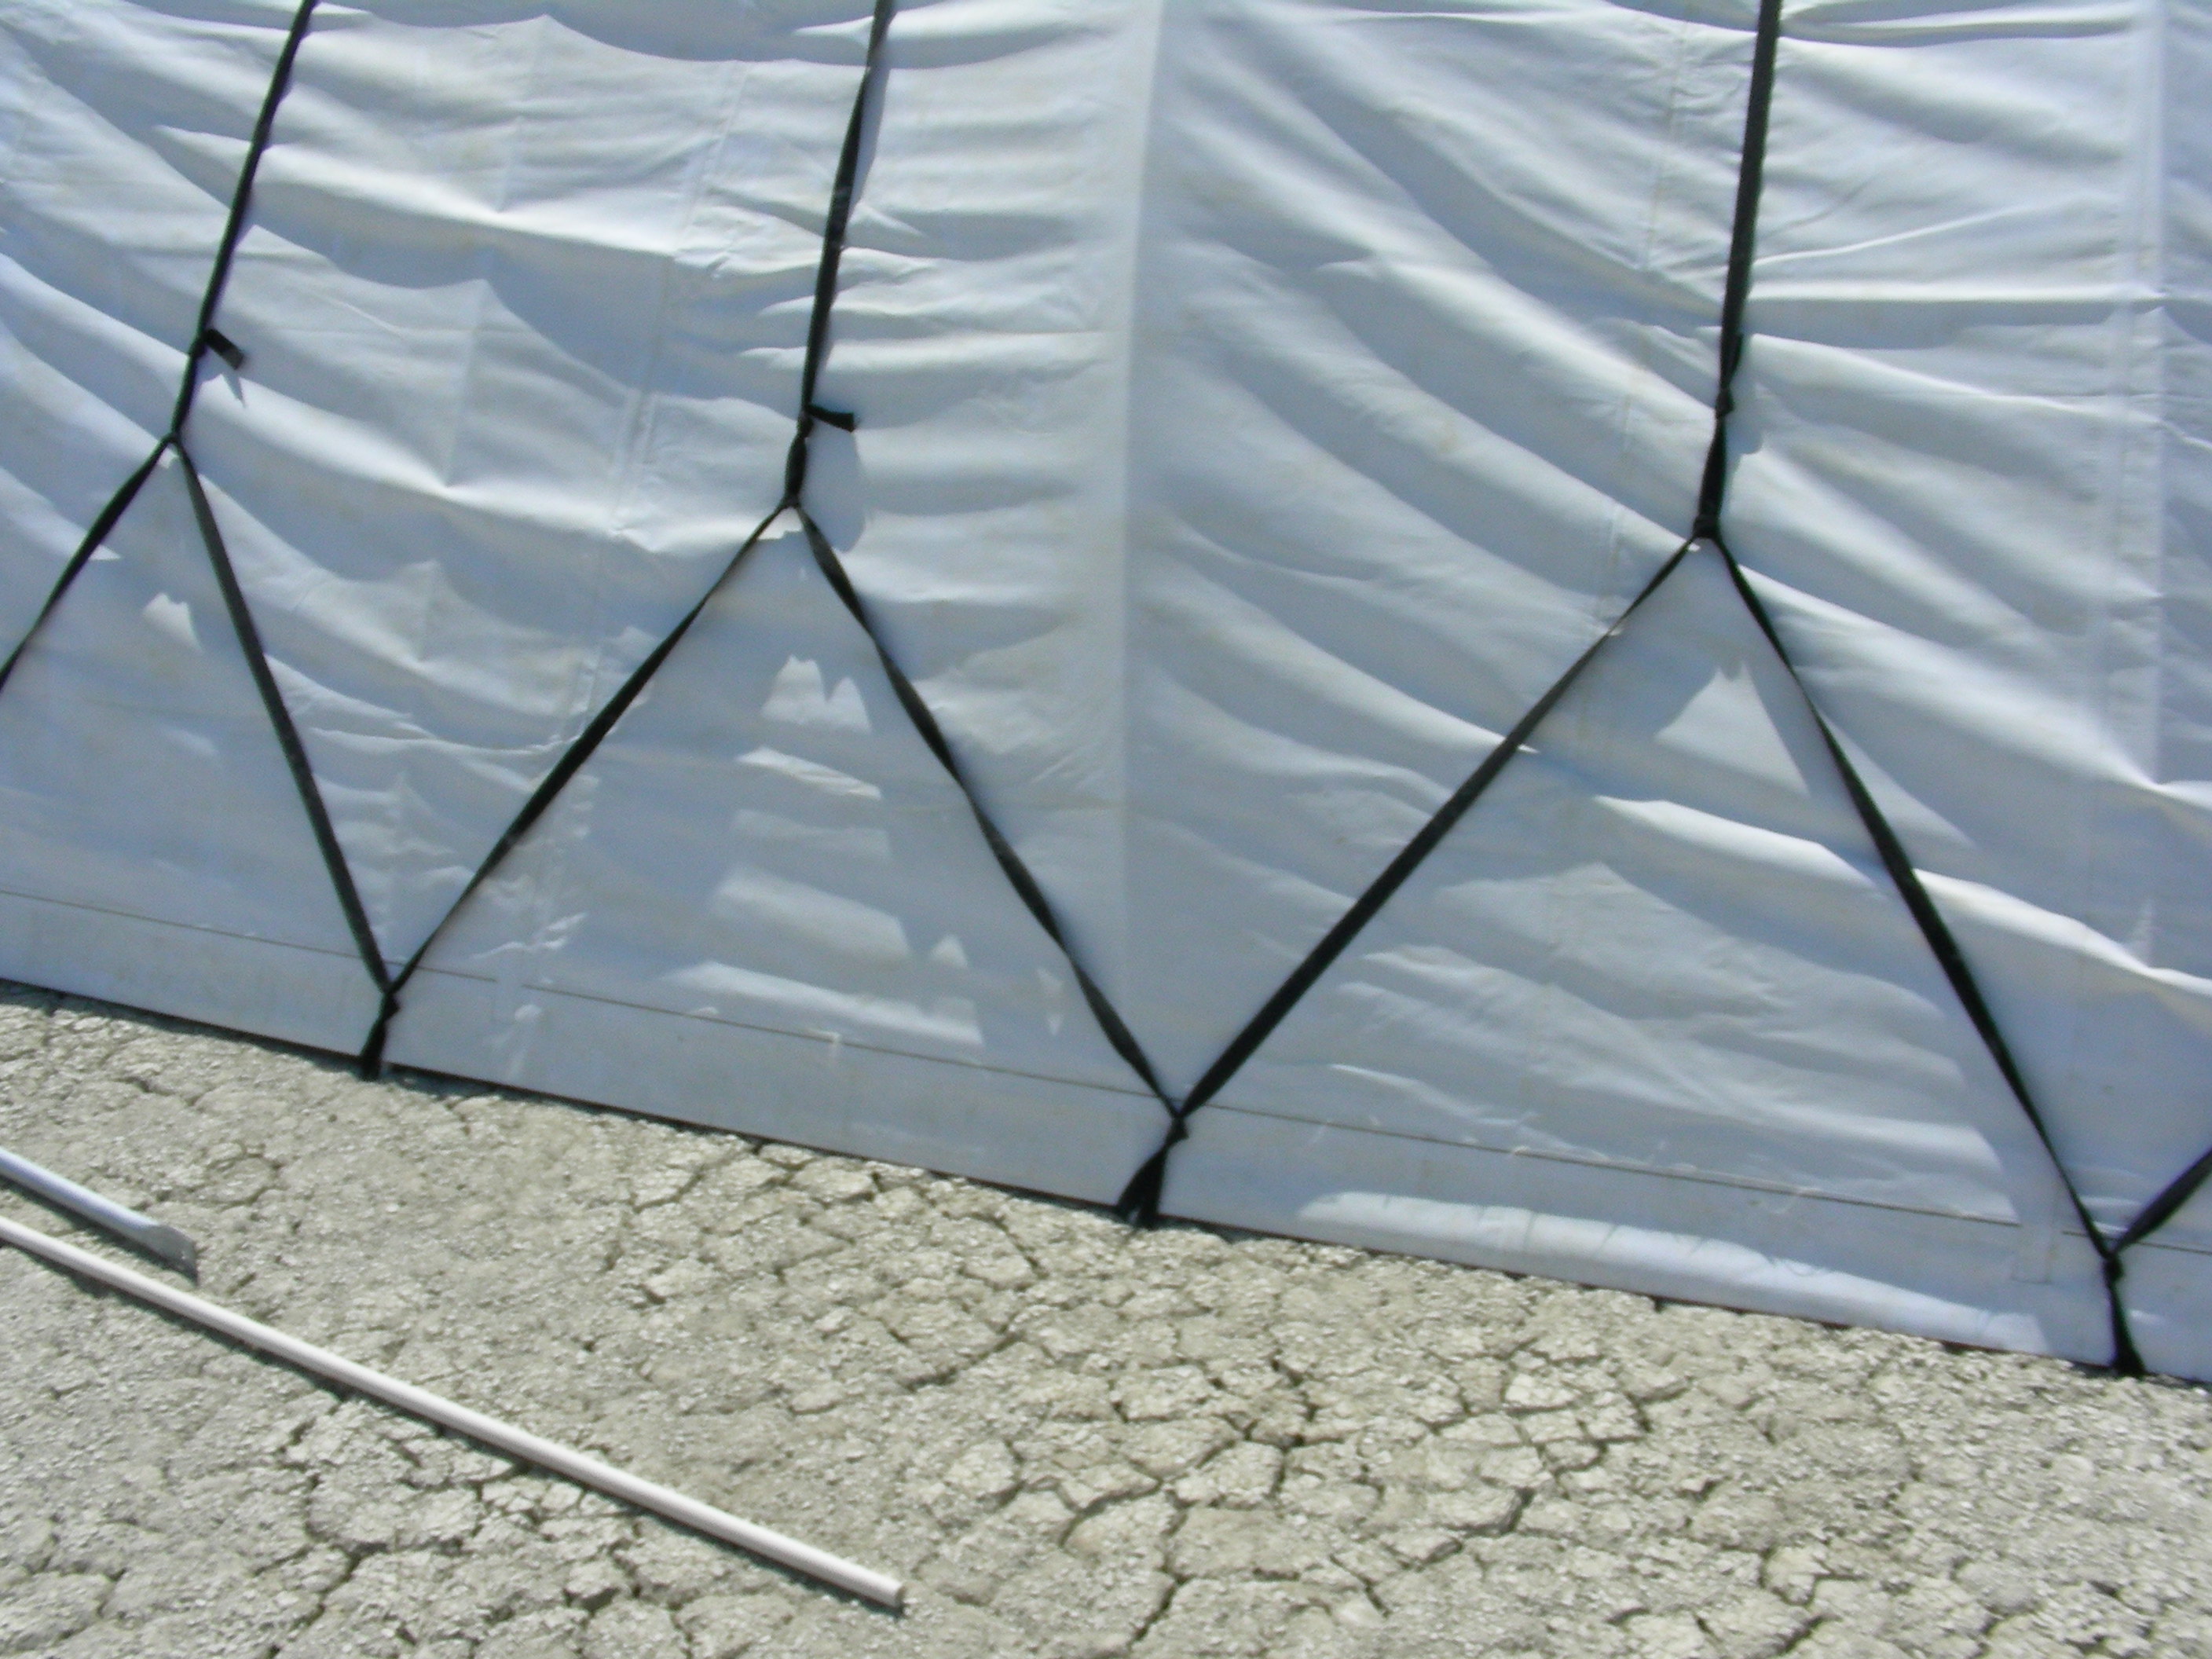
The trough line coming from the left buckles in to the apex of a saw line. Note the plastic triangle to keep the sawline buckle flat.
All of the ribs and guy lines need to be symmetrical and tensioned correctly before putting the tarp up.
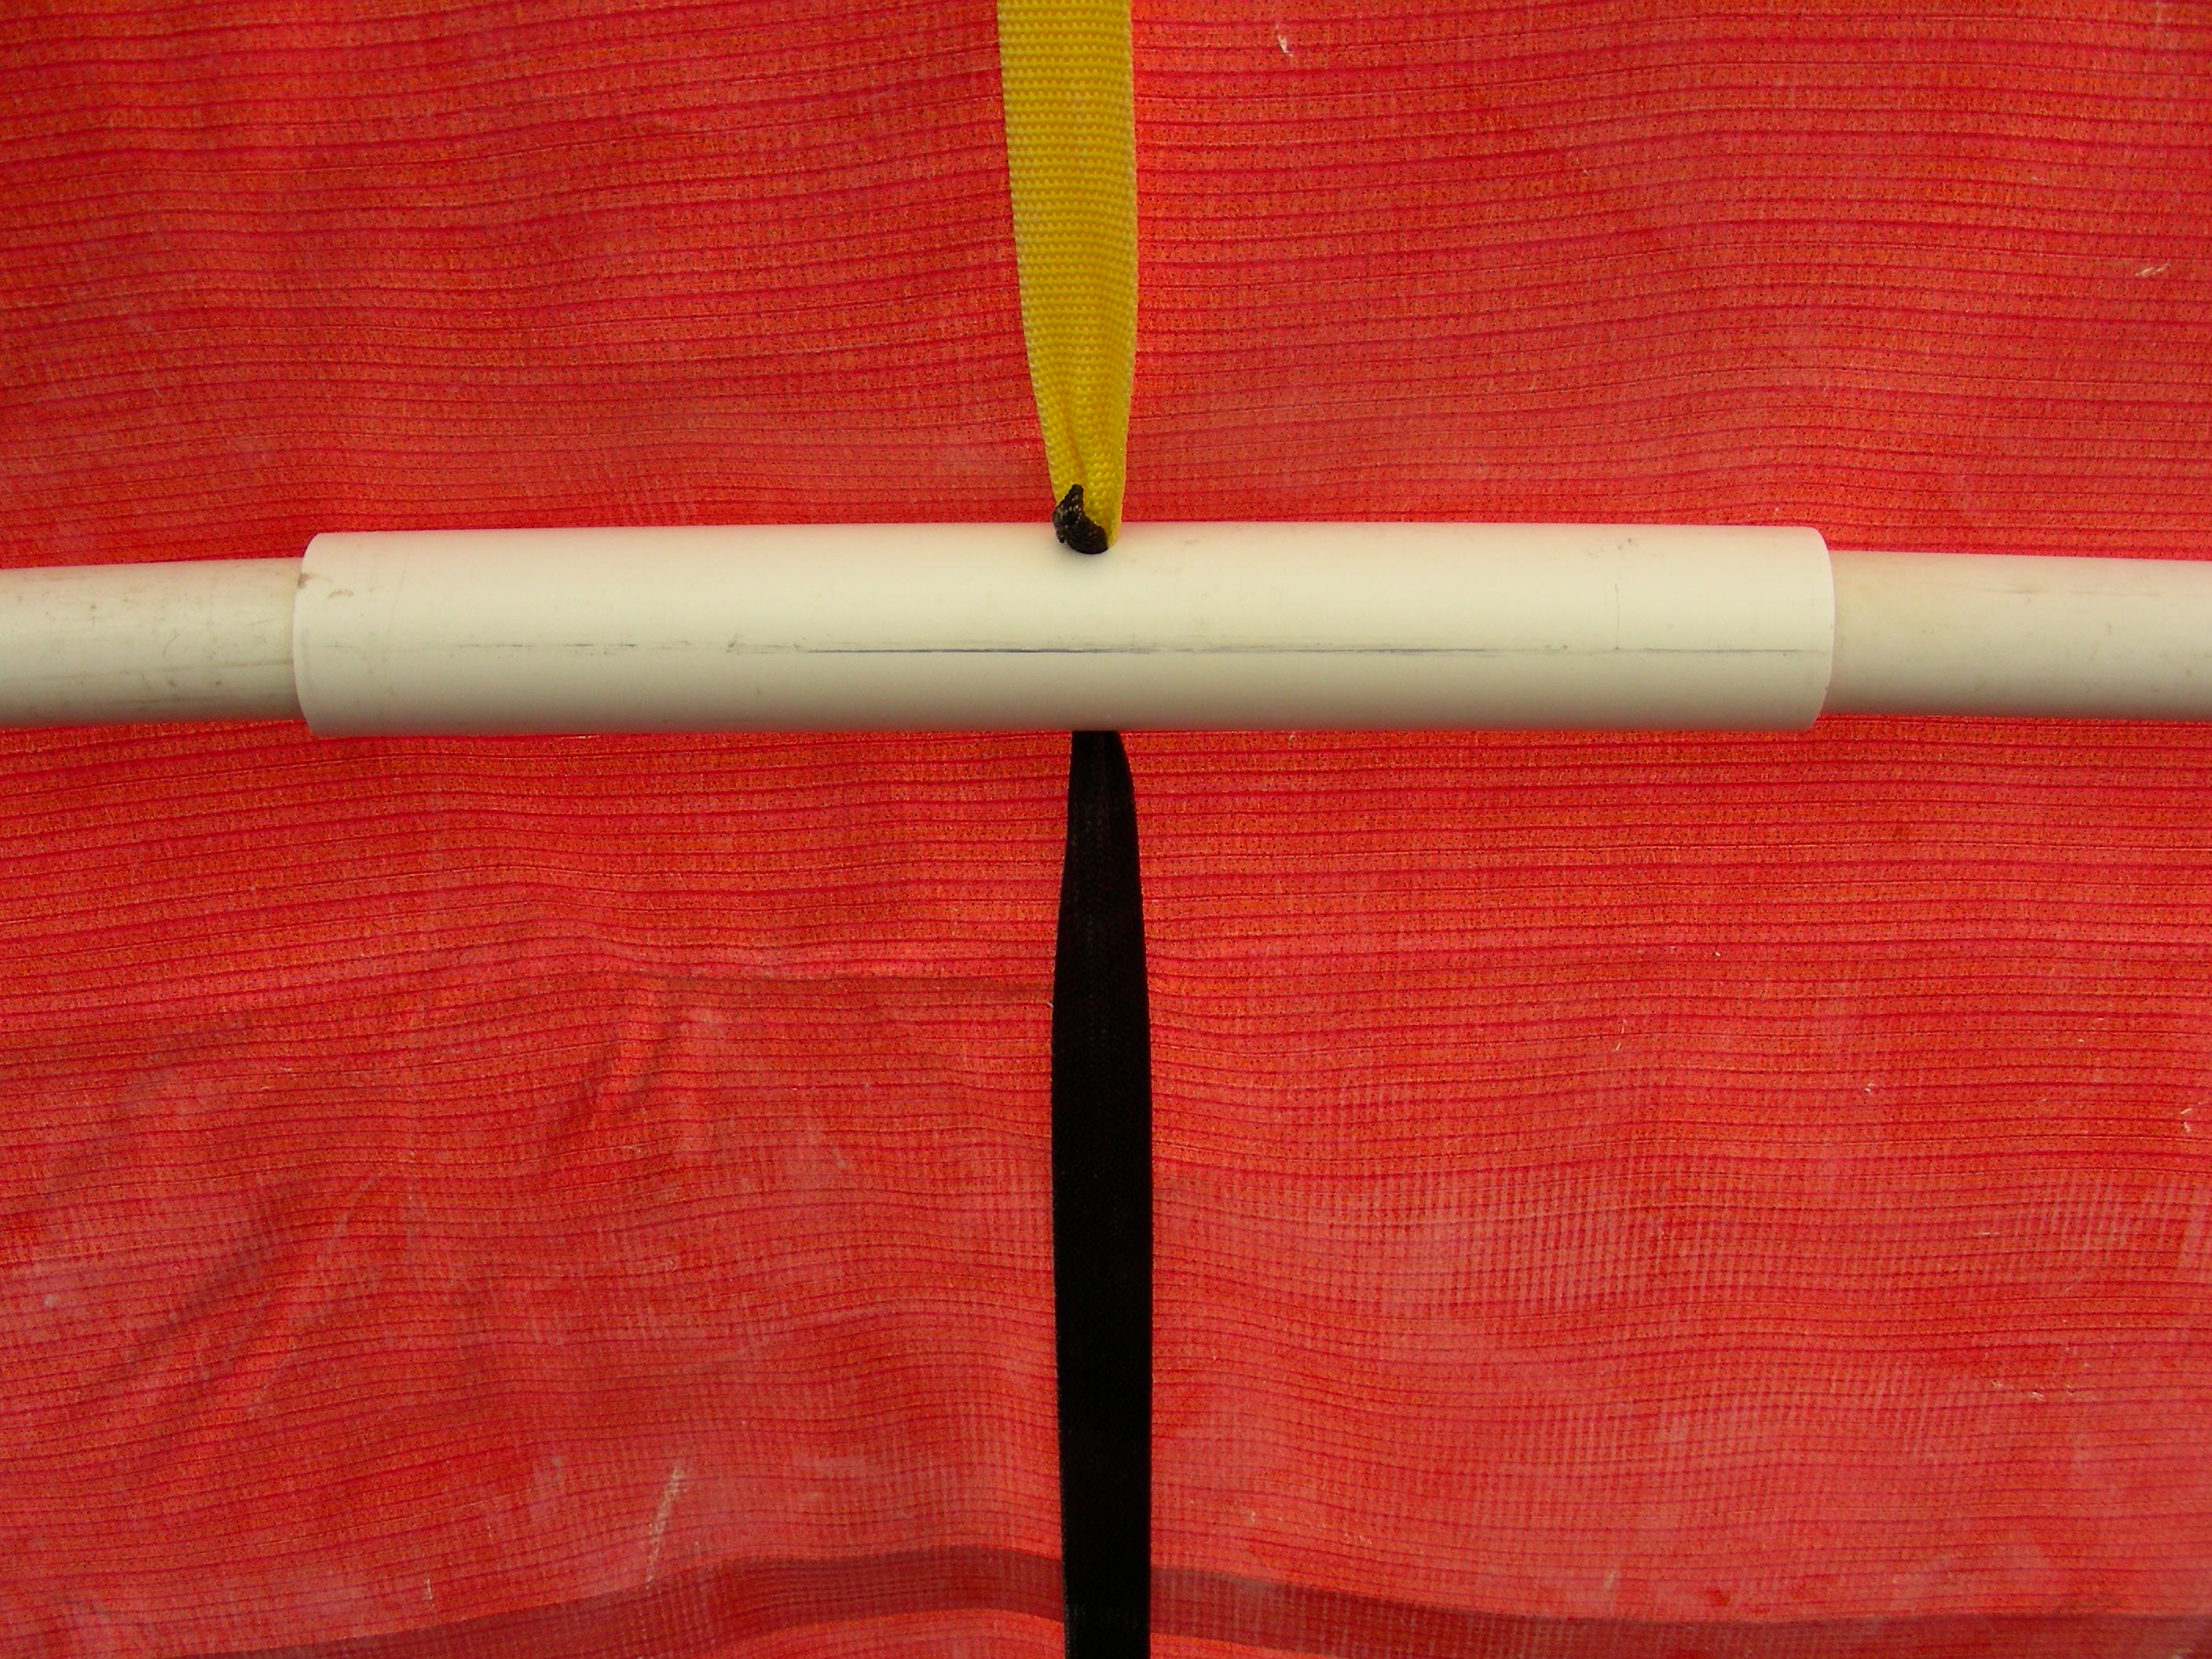
A 1.25in coupler with the 1in ribs inserted. flat webbing threaded through a hole has two knots inside the coupler to prevent the coupler from moving on the webbing .
Shade Arch Instructions that have been extracted from replies.
I have been getting quite a few emails from enthusiastic builders.
Use 3/8" inch rebar you can pull it out by hand and it just doesn’t need to be bigger.
The friction knot used to attach the saw lines to the rebar is simply a double wrap around the rebar. basically loop the webbing around your finger twice then loosen the wrap and remove your finger leaving the wrap in place then tie an over hand knot about 4 inches from the loops you just put in the webbing. Now the loops/twits will stay and you can loop them over the rebar.

To start the friction knot loop the webbing around your finger twice.

Then tie an overhand knot about 4 to 6 inches from the loops in the webbing. These loops will go around the rebar and cinch it when pulled.

The loops will stay in the webbing after the overhand knot is tied.
I wouldn't consider increasing the rib tubing diameter past 1” PVC as that will simply transfer the wind forces to another location and cause that place to fail/break the structure is designed to fold in the wind and not break. use 1 1/4" PVC couplers? and the 3ft spacing is important also.
The orange picture is a close up of one of my couplers. Its 1 1/4" by 12" long and a 3/8" hole drilled in the side of it. I then used a short piece of wire (copper pulled from household electrical romex wiring) taped to the webbing end as a needle to thread the webbing through the side hole and out the end of the coupler. Then two knots are tied in the webbing an inch apart or less. then the webbing is threaded back through the end of the coupler and out the other hole. its a long process to make the entire string of couplers and guys all as one webbing. the transition from black to yellow(in the orange picture) as an attempt to make the guys more visible at night but it wasn't worth it and all other coupler strings were made from one long piece of black webbing. The webbing is about 12$ per 300ft.
The saw lines are made from the same webbing. The twist I described in my last email holds rebar well if you use the lightest cheapest webbing they have at.
http://www.hitexcorp.com/5.html, +1
You can get the buckles and the small plastic triangles from them as well.
One windy year we did go as far as to put a support pole at each end opening I threaded a 1- 1/4" PVC "tee" over the 1" end rib then put one of the spare 12" couplers in the solo end of the tee and slipped a piece of 1" PVC into that as a support pole. It helped hold the opening up but got stressed badly. This is probably better then using a 2x4. I fear the 2x4 just because it can fall and hit something (most likely a head)
Symmetry of this entire design is super important.
The triangles in the drawing are the dimensions used to insure that both rows of rebar are parallel and the ends are exactly 90 degrees from the rebar lines. Each triangle is for a different width arch. I marked these dimensions on the guy ends of my coupler lines and used them so I wouldn't need a tape measure to do the layout.
1st lay out your coupler lines on the ground then using the couplers as markers pound in rebar for each coupler. Then the couplers temporarily go over the rebar to protect the rebar from getting blood on it. Next lay out your saw lines. One rebar row with buckles and the other side saw line is the no buckles side. The blank side gets the trough lines with a loop tied in it, girth hitched (feed the free end through the loop then pull it all through)

The saw line on the left and the trough line on the right ar goined by a girth hitch .JPG
A been bag with a buckle on it is eventually clipped to the trough line and tossed over the arch for every rib trough.
After the saw lines are looped over every rebar put the ribs together and erect them. Very important is to make sure your guys are tightened the ribs are perfect symmetrical before skinning the arch with the tarp.
The tarps MUST BLOCK IR we used two 15x50 ft vinyl billboard signs "stitched" together with 1/2" PVC. (picture)
Call around to the bill board sign company's. They use give the used signs away free. and if you can get some let me know.
Attaching the end ribs to the tarp. Bill boards have a tube pocket sewing in to them on all for edges. We just slide the rib through the pocket and cut a notch for the rib couplers. If you use regular tarps look into buying a grommet kit $20 and place lots of grommets along the edge then spiral wrap a line around the rib and thread each grommet. The recommended webbing will work well for this. Its very light weight and fits through holes with no problem.
Zook Designs
Summing Up the Installation Procedure.
1) Lay out a coupler line.
2) Place a rebar for each coupler.
3) Measure the triangular distance for the second row of rebar.
4) Place the second row of rebar.
5) Attach a sawline for each rebar on both rows.
6) Assemble and erect the ribs (using the coupler lines).
7) Tension the coupler lines with the attached guys.
8) Insure that the structure is symmetrical and taught.
9) Slide the tarp over the ribs.
10) Attach the trough lines to the saw lines with a girth hitch.
11) Throw the trough lines over the arch and buckle.
12) Tension the trough lines to create a tight structure.
13) Set up your tent, check for cops and spark a Phattie
arch@bobzook.com for comments!!
